
Introduction to Recovery Challenges
The Predicament of a Broken iPhone
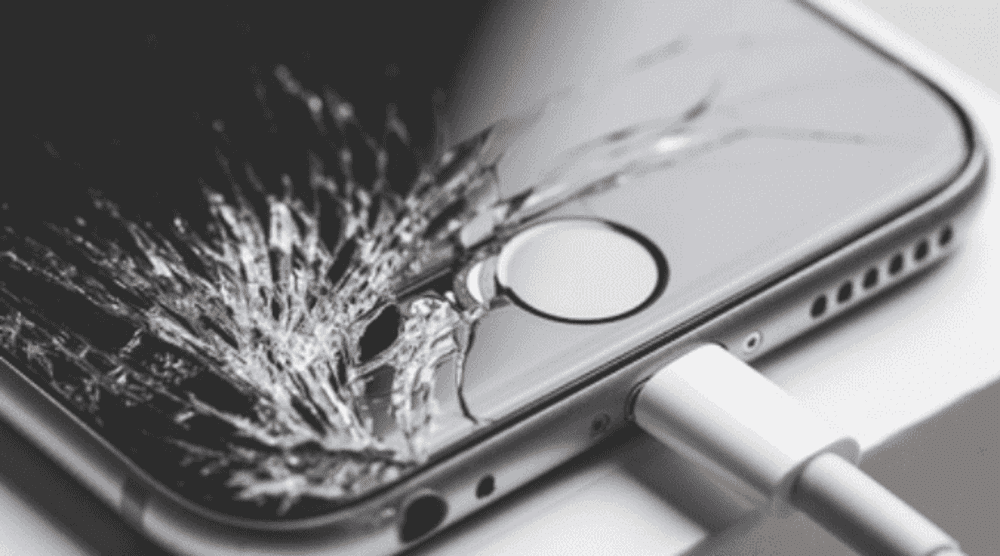
When your iPhone breaks, it not only disrupts your day-to-day communication but also risks the loss of invaluable data, such as photos that hold precious memories. Understanding the severity of damage is crucial as it directly influences the complexity of the recovery process. The realization that your treasured moments might be gone for good often leads to an understandable sense of urgency and distress.
Importance of Recovering Lost Memories
Preserving memories plays an important role in our lives, and photographs are one of the most intimate ways we capture these moments. Recovering lost memories from a broken iPhone is vital because photos often represent emotional anchors to our past, special events, and loved ones. The importance of these memories can’t be overstated as they are an irreplaceable part of our personal history which help to define and connect the narrative of our lives.
Understanding Your Options
Assessing the Damage and Recovery Feasibility
Evaluating the extent of damage to your iPhone is the first step in assessing the feasibility of photo recovery. If the screen is shattered but the phone still powers on and can navigate to the home screen, the prognosis is generally good. However, if the damage is more severe, such as liquid damage or internal component failure, recovery might be more challenging. Testing the functionality of buttons, speakers, and microphones also offers clues to the overall health of the device and the potential for successful data retrieval. Understanding these factors is critical in determining whether a simple DIY recovery will suffice or if professional services may be needed.
Exploring Built-in and Third-party Solutions
Several built-in services and third-party options are at your disposal for photo recovery. Both iCloud and iTunes offer straightforward solutions for restoring lost data if backups were made previously. iCloud seamlessly synchronizes and stores photos in the cloud allowing for easy recovery, while iTunes can create full backups of your iPhone on your computer.
In cases where built-in options are not available, third-party software solutions may offer a more robust feature set, including the capability to recover data without pre-existing backups. These solutions vary in their approach, some providing deep scanning to retrieve lost files, while others focus on repairing the underlying issues causing data inaccessibility. It is essential to select trustworthy and vetted applications to safeguard against potential data breaches or additional loss.
Initial Steps Before Recovery

Ensuring Safety and Avoiding Data Overwrite
Before attempting recovery, one of the paramount considerations is to ensure the safety of the remaining data. Avoid using the damaged iPhone further to prevent new data from overwriting the existing memories which can make the recovery process more complex or even impossible. Turn off the device to preserve its current state. Additionally, if you know your device is backed up regularly, refrain from initiating a new backup after experiencing data loss, as this might overwrite the previous backup that contains the lost photos.
Leveraging Cloud Services and Backup Features
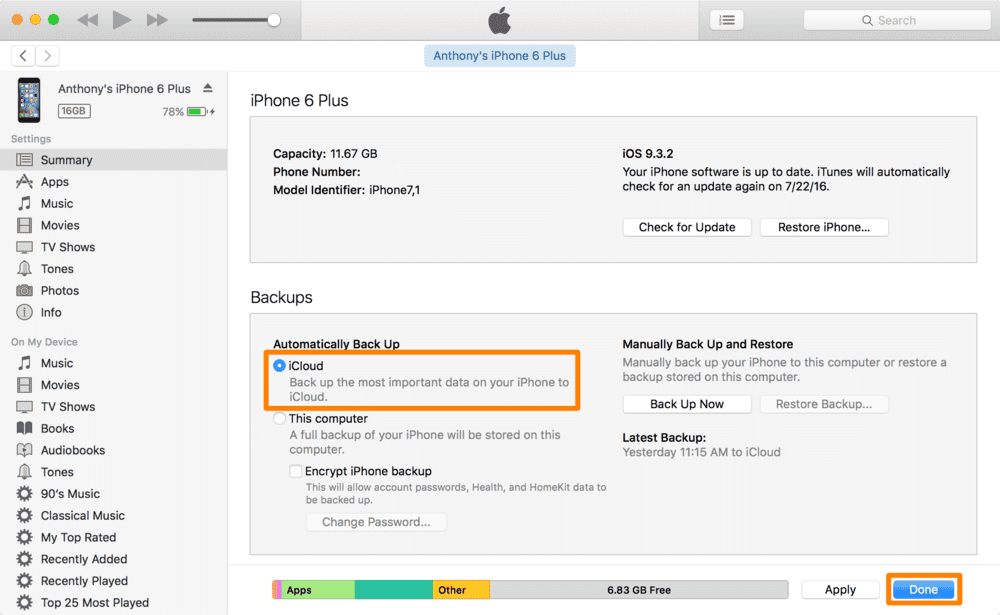
Cloud services and backup features are essential tools in preempting data loss. For iPhone users, iCloud offers a convenient and efficient method to back up photos automatically. As long as iCloud Backup is enabled, your phone regularly sends a copy of your photo library to the cloud whenever connected to WiFi. Additionally, features like Google Drive’s backup and sync can also serve as a safeguard, automatically updating your photo backups across multiple devices. Leveraging these services provides peace of mind, knowing that in the event your phone is damaged, your photos and videos can be easily restored to a new device.
How to recover photos from broken screen iPhone?
Recovering photos from an iPhone with a broken screen can be straightforward if the device is still operational. Connect your iPhone to a trusted computer using a USB cable and wait for iTunes to recognize it. If you’ve previously synchronized with iTunes, you can create a new backup or restore your photos from an existing backup.
Alternatively, if you have iCloud Photos turned on, your images will reside in iCloud. Log in to iCloud.com from a web browser and access your photos directly, downloading them to your computer or syncing them with another iOS device. For severe cases where the touch functionality is compromised, using accessories like an external keyboard or seeking professional screen repair might be necessary to gain access to the device and enable backup recovery.
DIY Methods for Photo Recovery
Retrieving Photos from iCloud or iTunes Backup
If you’ve backed up your iPhone using iCloud or iTunes before the device was broken, retrieving your photos can be done quite easily. For iCloud, just sign into iCloud.com or use a new Apple device and access your backups to restore your photos. Make sure you are connected to a stable internet connection as you will be downloading potentially large files.
For iTunes, connect a new or functioning iPhone to the computer where the backup is stored. Launch iTunes, select the device icon, choose “Restore Backup”, and pick the most relevant backup based on the date and size. Keep in hang the device connected until the process is complete. It’s important to note that restoring from iTunes will overwrite the current data on the device with the data from the backup. Therefore, always make sure to backup any existing current data before proceeding with a restore to prevent data loss.
Syncing with Other Apple Devices
If you have other Apple devices, syncing with them can be a reliable fallback option for photo recovery. Utilizing the Continuity features that Apple provides, like Handoff and iCloud Photo Library, ensures that the data synchronizes across devices seamlessly. Simply enable iCloud Photos on your iPhone and your other Apple devices like an iPad or Mac, and your full photo library will be available on all devices connected to the same Apple ID.
To manually sync photos from a broken iPhone to a Mac, connect the iPhone via USB and use the Finder to access your photo albums. From there, you can select which photos or albums to back up onto your Mac’s hard drive. On a Mac with iTunes, choose the device icon after connecting your iPhone, select Photos in the sidebar, and then select the “Sync Photos” checkbox.
When to Consider Expert Help
Expert assistance should be considered when you’ve exhausted all at-home methods without success, or when the extent of the iPhone’s damage precludes standard recovery efforts. Professional services may come into play if you’re dealing with complex issues such as an iPhone that won’t turn on, failure in recognizing the device on iTunes, or severe physical damage.
Reaching out to Apple Support can provide a diagnostic service to assess the condition of your iPhone and suggest possible solutions for photo recovery. Moreover, certified repair services such as those offered by Apple or other authorized providers have advanced tools and software that can sometimes succeed where DIY methods cannot. Experts will also handle your data with confidentiality and can assist with more advanced data recovery methods, ensuring the best possible chance to salvage your photos.
Utilizing Software Tools for Retrieval
Recommended Photo Recovery Applications
When it comes to restoring lost photos from a broken iPhone, a variety of photo recovery applications are recommended. Stellar Photo Recovery is favored for its ability to recover photos from various types of data loss scenarios, including accidental deletion and formatting issues, and supports various file types.
For recovery specific to iOS devices, MiniTool Mobile Recovery for iOS stands out. It allows retrieval not just from the device itself but also from iTunes and iCloud backups. It’s suitable for all models of iPhone, iPad, and iPod Touch and offers a user-friendly interface.
Another notable option is EaseUS MobiSaver, which offers both a free and professional version to suit different user needs. These applications provide a ray of hope for retrieving memorable captures that otherwise seemed lost due to a damaged iPhone.
Step-by-Step Guide to Using Recovery Tools
Using recovery tools usually follows a standard procedure which can be outlined in the following steps:
- Install the Recovery Tool: Download and install your chosen recovery software on your computer. Make sure to get it from the official website or a reputable source to avoid malware.
- Connect Your iPhone: Open the recovery program and connect your broken iPhone to the computer using a USB cable. Wait for the tool to recognize your device.
- Scan for Lost Photos: Select the recovery mode that suits your situation – whether that’s direct recovery from the device, from an iTunes backup, or an iCloud backup. Start the scanning process, which may take some time depending on the storage size.
- Preview and Select Photos: Once the scan is complete, preview the found photos. Most recovery tools offer a preview feature to ensure you are recovering the right items.
- Recover and Save: Select the photos you wish to recover and click the option to restore them. Save the recovered photos to a secure location on your computer or an external storage device.
Remember to avoid saving the recovered files back onto your damaged iPhone to prevent further data loss or overwrite issues. If the recovery tool requires more complex operations, refer to the user manual or online resources provided by the software manufacturer for detailed instructions.
Preventing Future Photo Loss
Best Practices for iPhone Data Backup
Protecting the data and memories stored on your iPhone is imperative, and regular backups are the best line of defense. Here are some best practices:
- Enable iCloud Backup: Make sure iCloud Backup is turned on in your iPhone settings. Your device will automatically upload your data to the cloud whenever it’s connected to Wi-Fi and charging.
- Regularly Sync with iTunes: For added security, connect your iPhone to a computer and use iTunes (or Finder on macOS Catalina and later) to create backups. This will save a complete copy of your iPhone’s data, including your photos, on your computer.
- Use a Passcode and Two-Factor Authentication: Secure your iCloud and Apple ID accounts with strong passwords and two-factor authentication to prevent unauthorized access to your backups.
- Consider Multiple Backup Services: In addition to iCloud, consider using other cloud-based services like Google Photos or Dropbox for redundant backups.
- Backup Before Updates or Repairs: Always back up your iPhone before installing updates or taking it in for repairs to preserve your current data state.
Following these practices will significantly reduce the risk of photo loss from your iPhone due to damage or other unforeseen incidents.
Protecting Your Device from Physical Damage

Securing your iPhone against physical damage is just as important as data backup to prevent photo loss. Here are ways to safeguard your device:
- Use Protective Gear: Invest in a robust case and a high-quality screen protector to shield your iPhone from knocks, drops, and scratches that can lead to costly repairs or data loss.
- Avoid Extreme Conditions: Keep the iPhone away from extreme temperatures, moisture, and direct sunlight which can cause hardware malfunctions.
- Be Mindful of Water Exposure: Even though many iPhones are water-resistant, it’s best to avoid water exposure as it could lead to irreversible damage. If an accident occurs, turn off the phone immediately and consult a professional repair service.
- Regular Maintenance: Clean your iPhone’s charging port and headphone jack regularly to prevent dust and debris build-up that can cause damage over time.
- Handling with Care: Practicing mindful handling, like not sitting with your iPhone in your back pocket or placing it on unstable surfaces, reduces accidental falls.
By combining these protective measures with regular backups, you significantly bolster the resilience of your device against unforeseen events that could result in data loss.
FAQs
Is photo recovery possible without a backup?
Yes, photo recovery without a backup is possible using third-party data recovery software that can scan your iPhone’s internal memory directly for recoverable photos. However, the success rate depends on the phone’s condition and whether new data has overwritten the lost photos.
How to switch from one iPhone to another
Switching from one iPhone to another is seamless with iCloud and Quick Start. Backup your old iPhone to iCloud, then power on the new iPhone and place it near your current one. Follow on-screen instructions to transfer data using your Apple ID.


Leave A Comment